Upload files through the Asset Manager

Upload documents, images, or media files.

Use a consistent file naming convention to make it easier to locate files. You should:
  • Include the question name if applicable.
  • Include descriptive words in the name.
  • Use CamelCase (capitalize the first letter of each word) for multi-word names.
  • Use underscores (_) or dashes (-) to separate logical sections of the name.
  • Do not include spaces or special characters, except underscores (_) and dashes (-).
Example

Q5_SleepingCat.jpeg

  1. In Power Survey Authoring, click the Assets tab.
  2. Select the folder that the files will be uploaded to.
    • To upload files that will be shared across surveys, select the Shared Media Folder.
    • To upload files that are only for the survey, select a folder, based on the file type, in the Study Media Folder.
      Folder File extensions
      documents .doc, .docx, .htm, .html, .pdf, .ppt, .pptx, .rtf, .txt, .xlsx, .xml
      images .bmp, .fif, .gif, .ico, .ief, .jpeg, .jpg, .pict, .png, .ras, .rgb, .xbm, .xpm, .xwd
      media .aiff, .asx, .avi, .dcr, .mov, .mpr, .mpeg, .mpg, .ra, .ram, .wav, .wma, .wmf, .wmv
      Note: The maximum file size for all file types is 5 MB.
  3. At the top-left, click Upload.
  4. In the dialog, click Browse.
  5. Select the file to upload.
    To select more than one file, hold down the Ctrl key, and then click the images that you want to upload.
  6. Click Open.
  7. To upload the images, click Upload All.
  8. After the files appear in the Uploaded Files section, click Done.
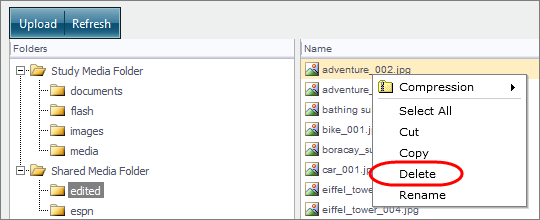
  9. Optional: To remove an uploaded file, right-click the file, and then select Delete.