Set up SSO with Azure
This topic walks you through how to set up Single Sign-On (SSO) between the Alida platform and Azure.
In some cases, only users that are members of verified domains can be added to your community. This occurs if the community-level SSO-only mode is enabled. In this case, a flag is displayed at the top of the SSO Settings page.
In some cases, users may be prevented from signing in with their email and password. This occurs if the domain-level SSO-only mode is enabled for selected domains. In this case, a flag is displayed at the top of the SSO Settings page. You can view the affected users by selecting Product Settings > Manage Users in the navigation bar. The SSO column displays a flag for users that are restricted to SSO login only.

If the SSO column is not included in the Manage Users table, no users are affected.
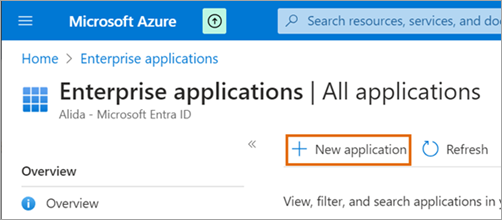
Create an Azure application
In this part of the workflow, you are creating the application tile that SSO users will click to access the Alida platform.
-
Click
New application.
Start your Azure application configuration
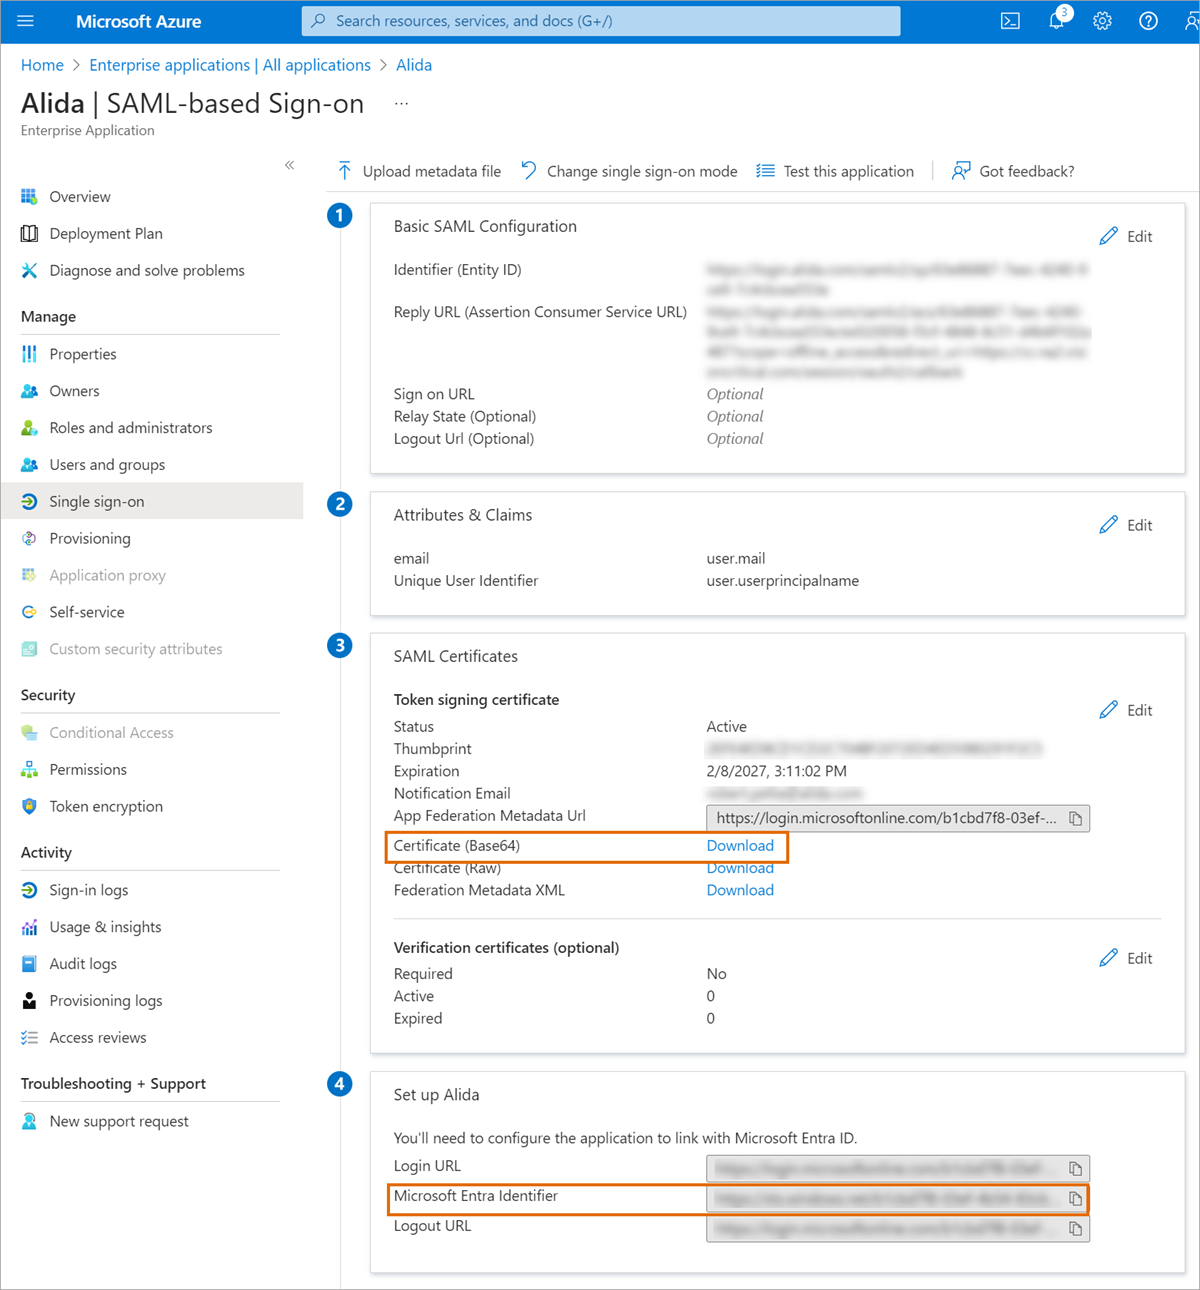
After you create the application tile, you need to copy specific configuration values. You'll enter these values into Alida's SSO Setup page later.
-
Click
, open the
.cer file in Notepad, and store the X.509
certificate for later use.
Click the screenshot below to view a larger version.

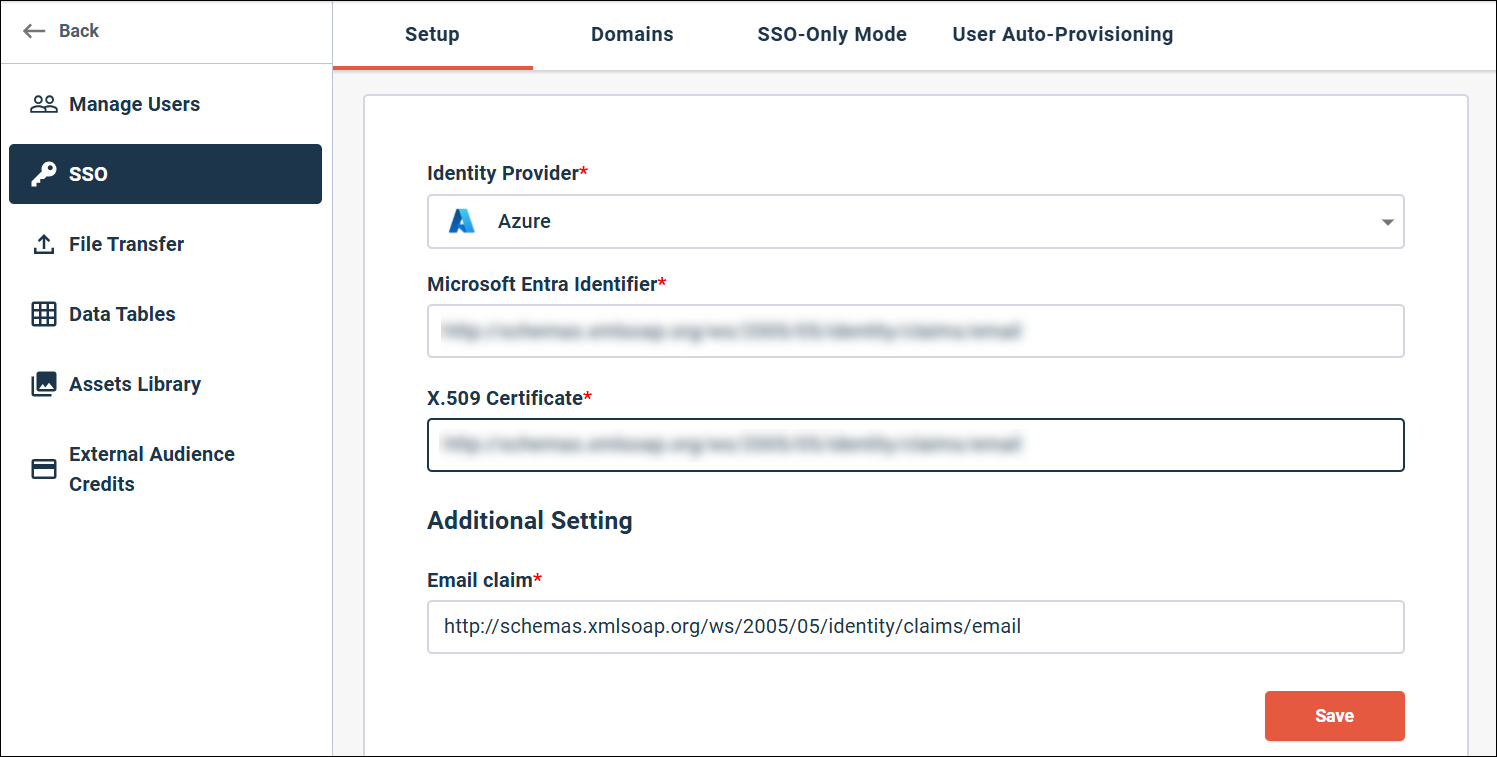
Install Azure SSO on an Alida community
Enter the Azure configuration values into Alida's SSO Setup page.
Users will be unable to authenticate from the time you generate these settings until you complete the SSO configuration in your Identity Provider.
Contact Technical Support to schedule your migration. You must have a member of the Alida Cloud Team available on a call to assist before the migration can proceed.
-
Click
Save.
-
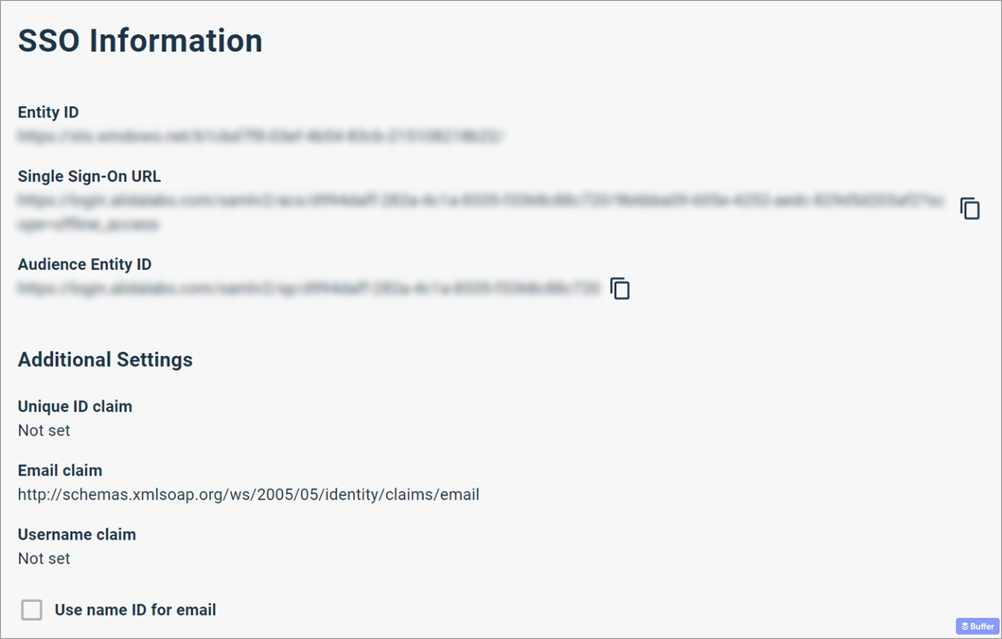
Copy the
Audience Entity ID and store it for later
use.
Click the screenshot below to view a larger version.

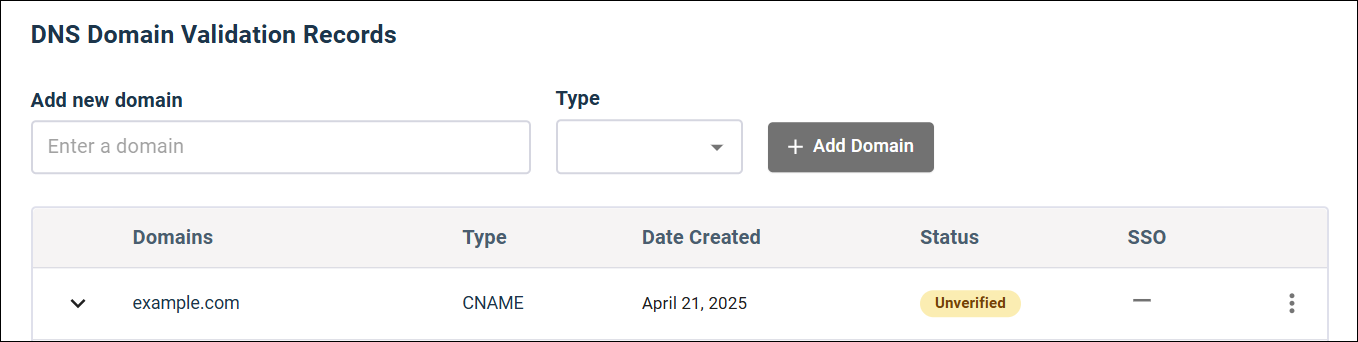
Add and verify a domain
Add the registered domain that your company owns and that you use for employees' email addresses.
-
In the
Add new domain field, type the domain value,
select the
Type (CNAME or
TXT), and click
Add Domain.
For example, if a potential SSO user's email is
bob.smith@example.com, you'd type example.com as the domain.The new entry is added to the domains list as an Unverified domain.
-
Click the down-arrow to the left of the domain entry to display
the
DNS Record.

-
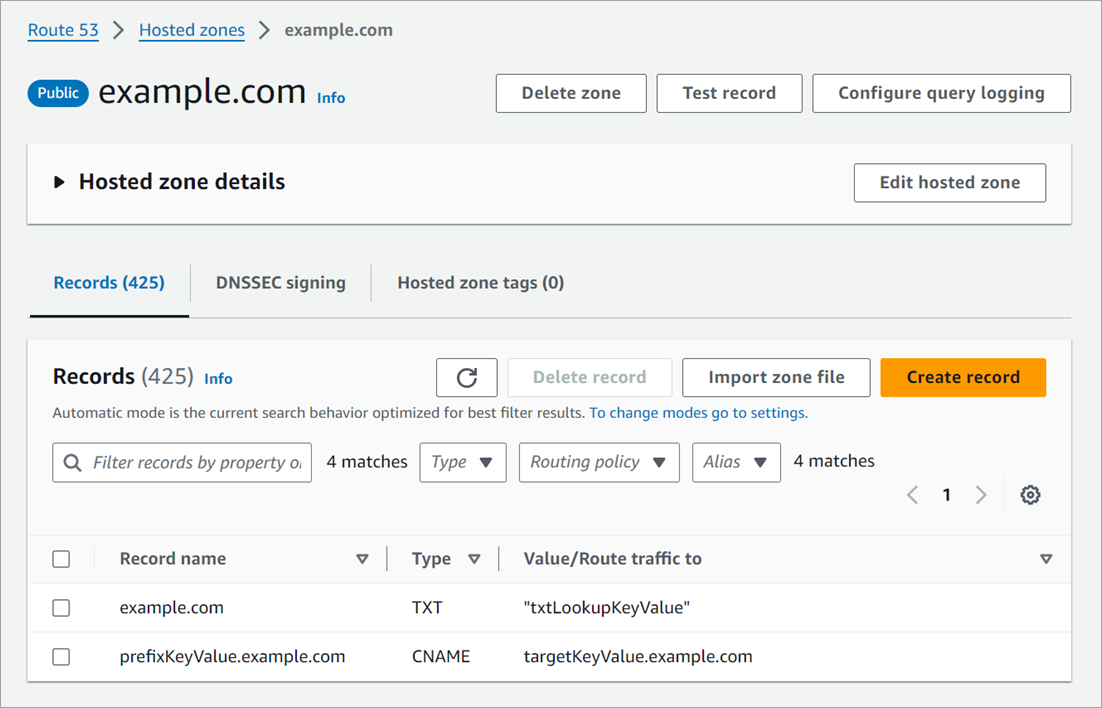
Add the values from the
Domains page to your DNS configuration.
For both CNAME and TXT DNS records, the three required values are listed separated by spaces:
- Add the first value as the owner or source name.
- Add the second value as the DNS record type. It will either be CNAME or TXT.
- Add the third value as the target or destination name.
Example This example shows the two supported DNS record formats configured in AWS Route 53. The first is a TXT record, and the second is a CNAME record.
- The first value in the DNS record is added as the Record Name field.
- The second value in the DNS record is added as the Type field.
- The third value in the DNS record is added as the Value/Route traffic to field.
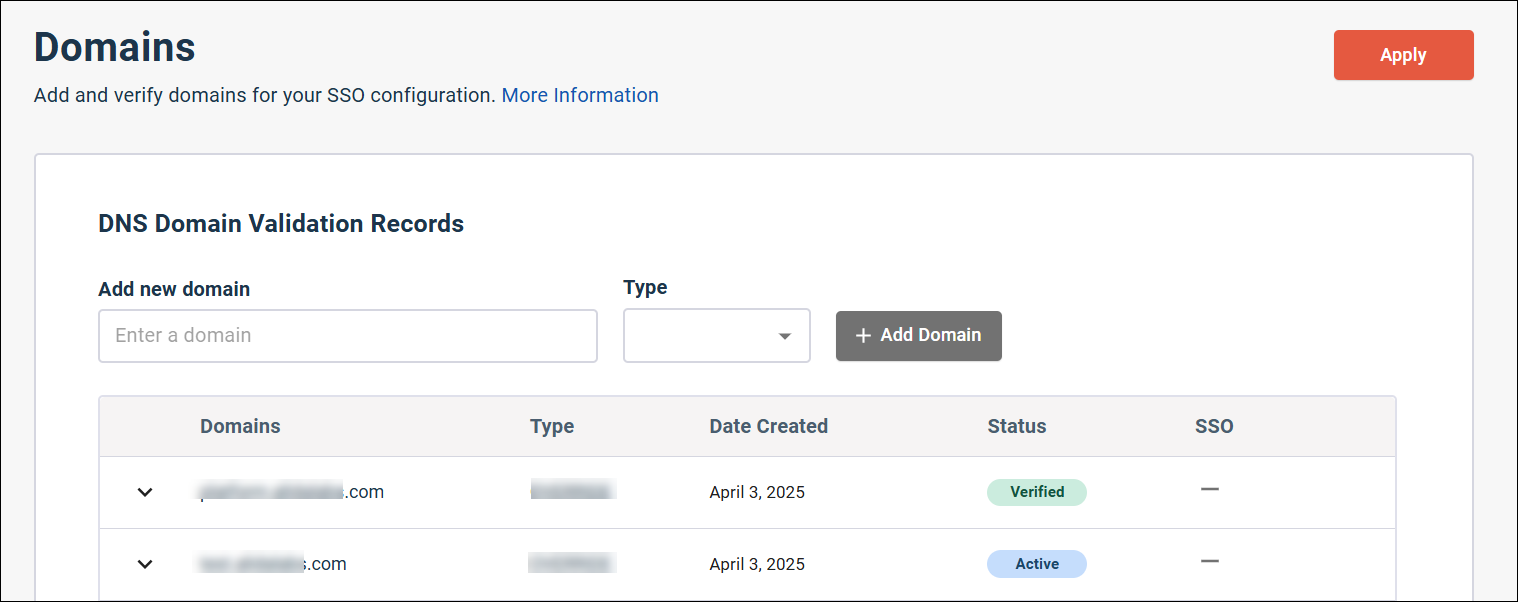
-
Click
Apply.
The domain status changes from Verified to Active.
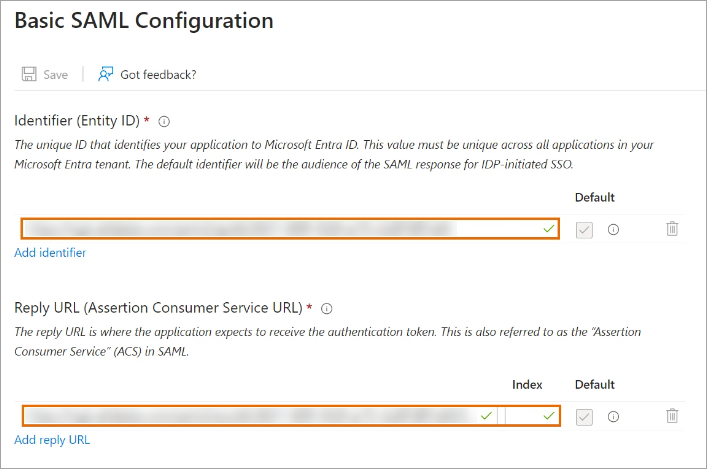
Complete your Azure application configuration
-
Under
Reply URL (Assertion Consumer Service URL),
enter the
Single Sign-On URL you stored earlier.
-
Click
Add new claim and create a new claim:
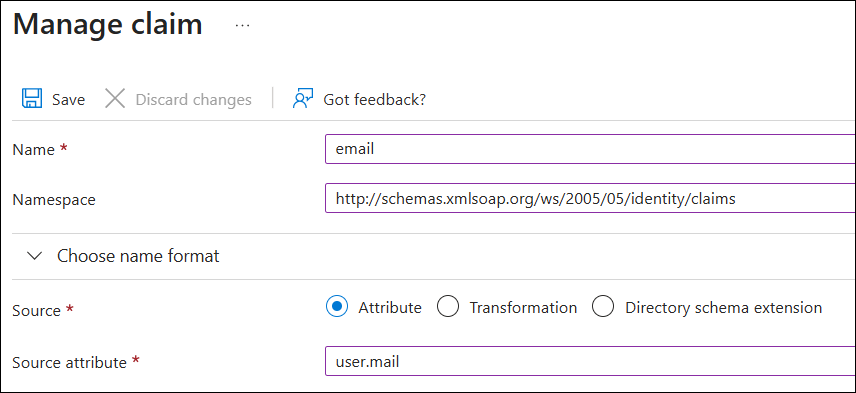
- Name: email
- Namespace: http://schemas.xmlsoap.org/ws/2005/05/identity/claims
- Source: Attribute
- Source attribute: user.mail
Important: Ensure that the new claim is added ashttp://schemas.xmlsoap.org/ws/2005/05/identity/claims/emailand nothttp://schemas.xmlsoap.org/ws/2005/05/identity/claims/email/email. In some situations, the second/emailpath may be added erroneously. The email claim entry must match the following screenshot.
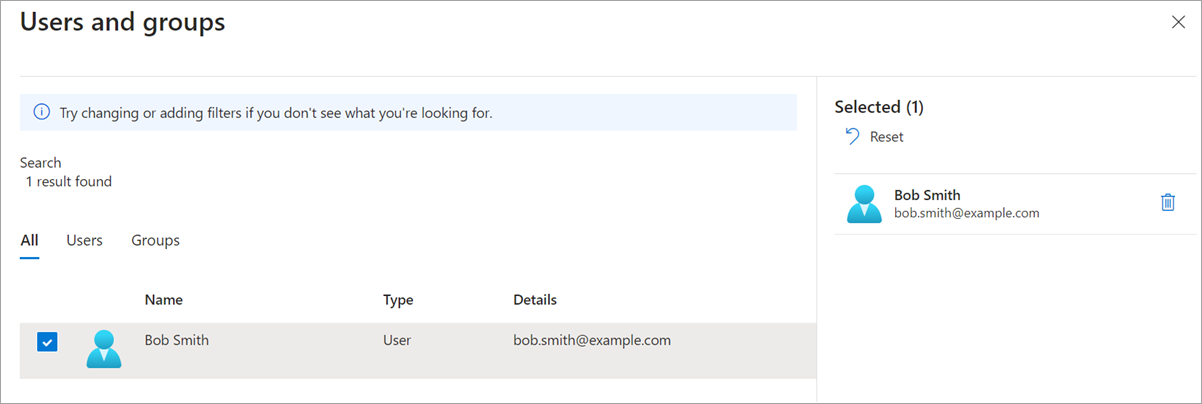
Assign a user to the Azure application
In order for SSO to work, the same user must exist in Azure (with the Alida application associated to that user) and in the Alida platform.
-
Select the user you added in the panel (for example,
bob.smith@example.com) and click
Select.
Click the screenshot below to view a larger version.

Verify SSO login
-
The user clicks the application's tile (for example,
Alida).
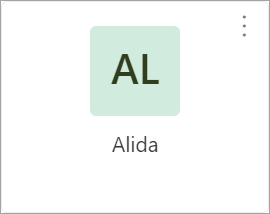 Result: The community opens or they are able to switch to it.