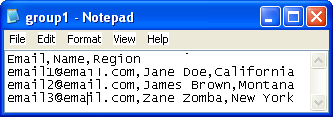
 Export data
Export participant data, so you can analyze it externally.
- In Power Survey Authoring, click the Exports tab.
- Click New Export.
- In the New Study Export dialog, type a name for the export and then click OK.
- Optional: In the Export Name field, edit the export name.
-
To add or remove questions from the export, click
Edit Questions.
- In the Question Picker, right-click the question and select Add or Delete.
- From the Data Set list, select Live or Test data.
- Optional:
To filter the participant data that is included in the export,
click
Edit Filter.
By default, the filter includes data for all members who have completed the survey (ResponseStatus is Completed).
-
From the
Language list, select the language for the
export.
The available languages correspond with the existing languages in the survey. For more information about survey languages, see Languages.
-
From the
Export Via list, select one of the following
options:
- Email
Attachment: The exported file is sent to the email address in the
Email Address field that appears if you
select this option.
Note: File attachments can be as large as 20 MB. Email systems with file size restrictions may prevent the email from being delivered.
- Download to Desktop: The exported file is downloaded and saved to your local desktop.
- Email
Attachment: The exported file is sent to the email address in the
Email Address field that appears if you
select this option.
-
From the
Select File Type option, select the format for
the export.
Option Description Comma Separated Value (CSV) A file type that stores tabular data and uses commas to separate values. 
UnicodeCSV Stores tabular data that uses commas to separate values. However, Unicode CSV files support Unicode characters, such as accented, Cyrillic, or Chinese characters. SPSS A file type that is supported by the IBM SPSS statistics software package. Use this file type to export your data to SPSS for analysis. From the Version list, specify one of the following SPSS versions for your export:- V12
- V14
- V20
Note: Precodes with more than eight characters are truncated in Single Choice answer options.UnicodeCSVLabelled Stores tabular data that uses commas to separate values. and supports Unicode characters, such as accented, Cyrillic, or Chinese characters.
The UnicodeCSVLabelled option exports values for the question name, participant answer, position, and code, as well as the question type and question text.
Note: Precoded responses will appear as answer labels in the data file. However, labelled data for Multi Choice questions will appear as 1 for Selected and 0 for Not Selected.
Use this option to provide context for coded surveys.
UnicodeCSVEnhanced Stores tabular data that uses commas to separate values, and supports Unicode characters such as accented, Cyrillic, or Chinese characters.
The UnicodeCSVEnhanced option exports values for the question name, participant answer, position, and code, as well as the question type and question text.
Note:If you are exporting to a CSV or UnicodeCSV file, you can also specify the following:- Delimiter: The character that separates the values in the export file.
- Escape Character: The character used to avoid delimiter collision, which occurs when delimiters are introduced as part of the value text in the file, rather than the file structure. The escape character replaces any delimiters in your value text.
The following table shows the maximum number of characters you can export in Open End questions:
File type Maximum number of characters Comma Separated Value (CSV) 32,767 characters SPSS V12 255 characters SPSS V14 2500 characters SPSS V20 -
To protect the export file with a password, type a password in the
Password field.
The password must:
- Contain at least six and no more than twelve characters.
- Contain at least one uppercase letter.
- Contain at least one lowercase letter.
- Contain at least one number.
Note: For security reasons, passwords are not saved when the page is refreshed. - Optional:
Set up a schedule for the export.
Note:
- Recurring exports can only be delivered via email attachment.
- You cannot schedule a recurring export for more than one email address at a time.
- Select the Recurrence check box.
- In the Start Date field, select the date and time for sending the first email.
- In the Interval field, set how often the export will occur.
-
To save the settings, do one of the following:
- To save the settings without closing the page, click Apply.
- To save the settings and return to the main Exports page, click Save.
- Optional:
To start the export immediately, click
Run Export.
Note: If there are errors, the file is not exported, and the errors are displayed in red at the top of the page.
