Create an age roll-up without using calculated dates

In a recruitment survey for new members, you can ask participants for their year of birth and use this information to infer their ages. When participants complete the survey and select their year of birth, they are grouped into the appropriate age category automatically.

Prerequisites:

Before you begin, ensure you have created an Age profile variable with the age groups defined (for example, 18-24, 25-34, and so on). For more information, see Add a profile variable.

Using Calculated Date profile variables is the recommended way of creating age roll-ups, but calculated dates cannot be used in some situations. Use the following procedure to create age roll-ups when calculated dates cannot be used. Calculated Date profile variables cannot be used:

  • When you cannot collect a birth date, and instead only have the birth year.
  • When you need to filter reports in Surveys based on the age roll-up. Calculated Dates are not currently available in Report filter criteria.
  • When you want to use the age roll-up in Survey logic. Calculated Dates are not currently available in Set Value or Profile survey actions.
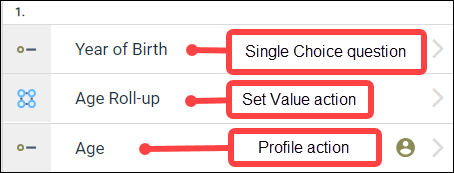
  1. In your recruitment survey, create a Year of Birth question.
    1. From the Survey Builder Toolbox, under Questions, click the Single Choice question.
    2. In the Table of Contents, click the Single Choice question.
      Result: The Edit Pane appears.
    3. Optional: Change the Question name to Year of Birth.
    4. In the Question text field, type the question text (for example, What is your year of birth?).
    5. In the Display answers as list, select Dropdown.
  2. In Excel, create the Year of Birth answer values.
    1. Create a new Excel spreadsheet.
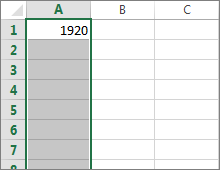
    2. In one of the cells, type the first year in the range (for example, 1920).
    3. Select a range of cells in the same column.
    4. On the Home menu, click Fill > Series.
    5. In the Series dialog, ensure you have these defaults:
      Option Setting
      Series in Columns
      Type Linear
      Step value 1
    6. In the Stop value field, type the last year of the year of birth range (for example, 2000), and click OK.
      Result:

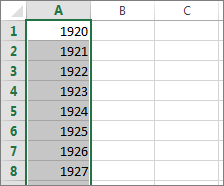
      The spreadsheet auto-populates all the years between the first and last values, in the range of cells you selected.

  3. In Excel, select all the Year of Birth answer values and press Ctrl+C to copy them.
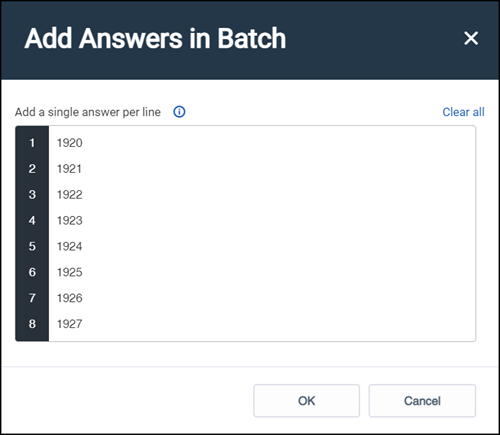
  4. In the recruitment survey, in the Year of Birth question, click Add Answers in Batch.
  5. In the Add Answers in Batch dialog, press Ctrl+V to paste the Year of Birth answer values, and click OK.
    Result:

    Each year is added as an answer option.

Once you have the year of birth for participants, you can infer their ages by changing the birth years you select for the Set Value actions you create this year, a year from now, two years from now, and so on.
  1. Create a Set Value action under the Single Choice question.
    1. From the Survey Toolbox, under Survey Actions, click the Set Value action.
    2. In the Table of Contents, click the Set Value action.
    3. Edit the Action name (for example, Age Roll-up).
    4. Optional: Add notes or a description.
  2. Create a Profile action under the Set Value action.
    1. From the Survey Toolbox, under Survey Actions, click the Profile action.
    2. In the Profile Question dialog, select your Age profile variable, and click OK.
    3. Select Hide question.
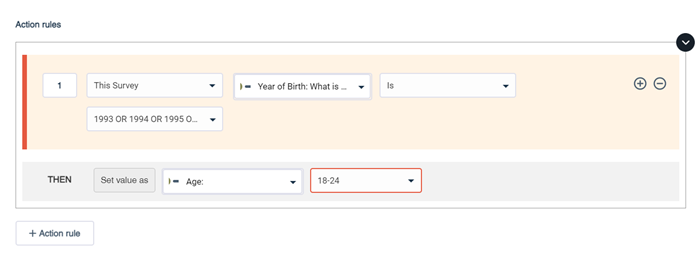
  3. In the Set Value action, define the conditions for each age roll-up.
    1. Under Action rules, from the Sources list, select This Survey.
    2. From the first Question or Variable list, select the Year of Birth question.
    3. Leave the operator set to Is.
    4. From the first Select answers/values list, select the values to include in the condition.
      For example, let's say the current year is 2017 and you are creating an age roll-up for participants aged 18-24. You would select birth years from 1993 to 1999.
    5. From the second Question or Variable list, select the Age Profile action.
    6. From the second Select answers/values list, select the profile value.
      For example, you would select the profile value 18-24.
    7. Click + Action rule to create the next action rule.
    8. Repeat steps a to g for each age group.