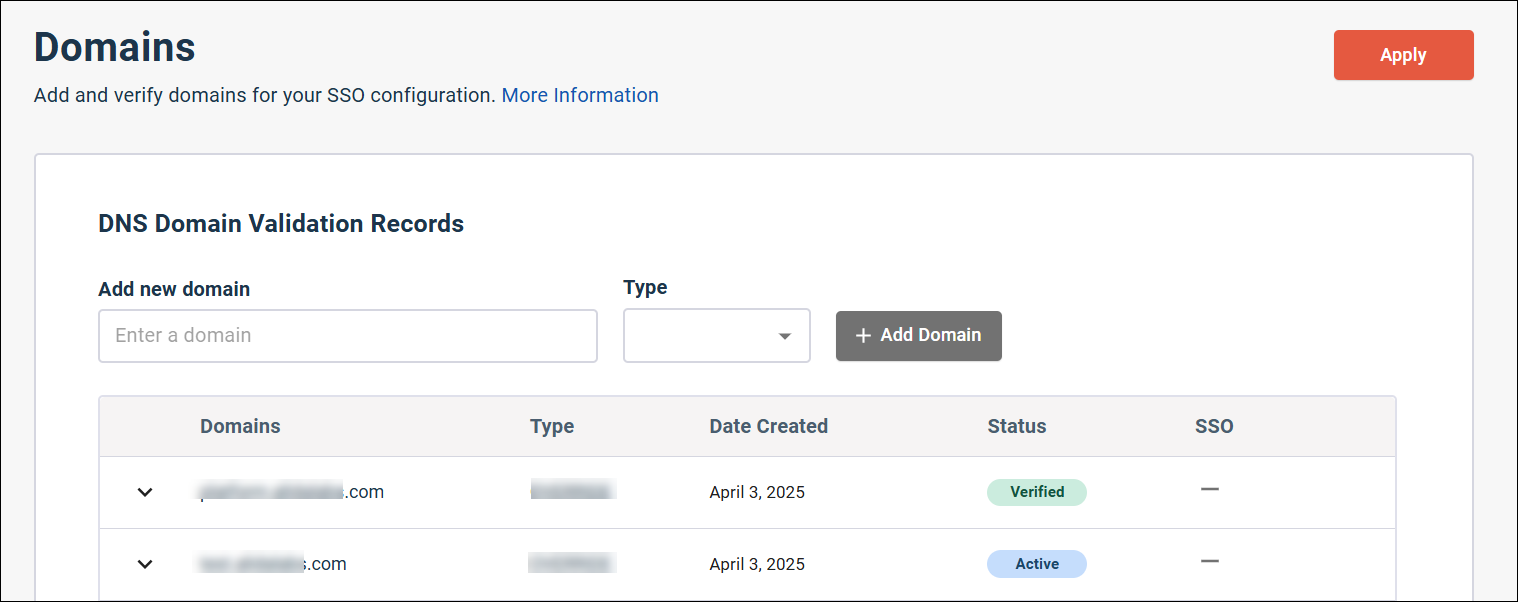
Add and verify a domain
Add the registered domain that your company owns and that you use for employees' email addresses.
You need to add and verify at least one domain to prevent unauthorized SSO authentication and domain spoofing, and to ensure a secure authentication flow.
-
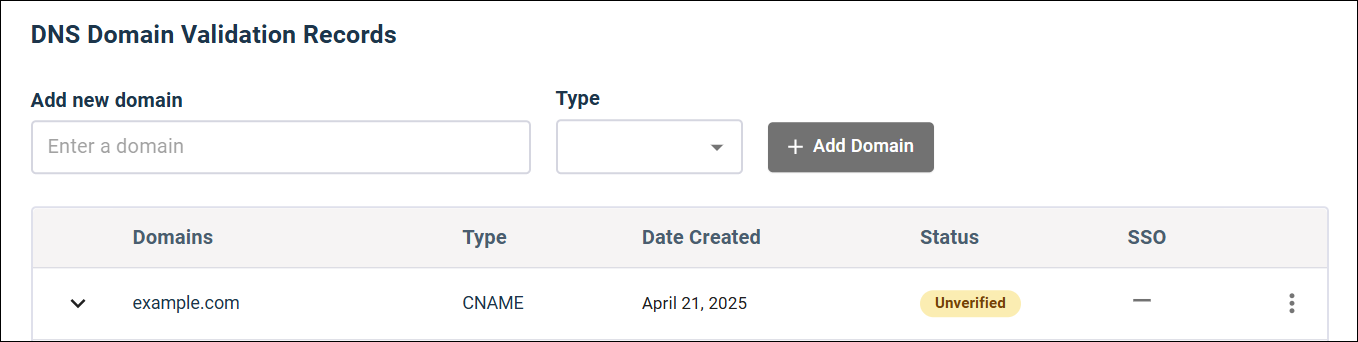
In the
Add new domain field, type the domain value,
select the
Type (CNAME or
TXT), and click
Add Domain.
For example, if a potential SSO user's email is
bob.smith@example.com, you'd type example.com as the domain.The new entry is added to the domains list as an Unverified domain.
-
Click the down-arrow to the left of the domain entry to display
the
DNS Record.

-
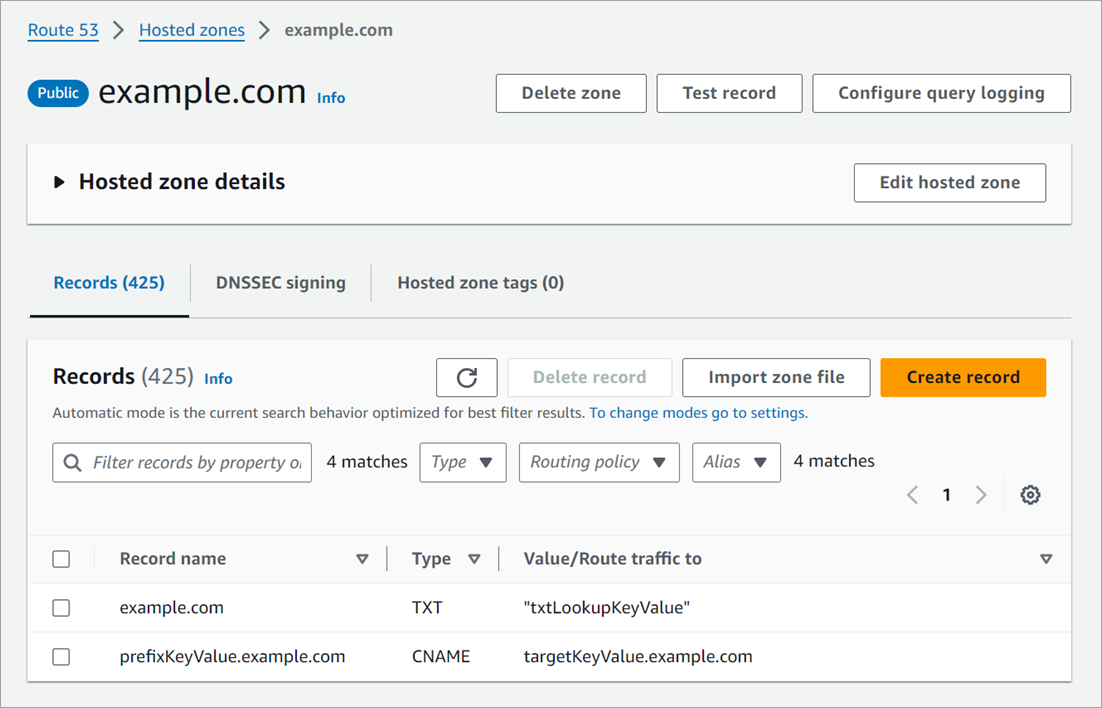
Add the values from the
Domains page to your DNS configuration.
For both CNAME and TXT DNS records, the three required values are listed separated by spaces:
- Add the first value as the owner or source name.
- Add the second value as the DNS record type. It will either be CNAME or TXT.
- Add the third value as the target or destination name.
Example This example shows the two supported DNS record formats configured in AWS Route 53. The first is a TXT record, and the second is a CNAME record.
- The first value in the DNS record is added as the Record Name field.
- The second value in the DNS record is added as the Type field.
- The third value in the DNS record is added as the Value/Route traffic to field.
-
Click
Apply.
The domain status changes from Verified to Active.