Set up SCIM with Okta

This topic walks you through the process of setting up SCIM in Okta.

Prerequisites:

Before you begin, you must complete the following prerequisite tasks:

  • Set up SSO with Okta. You must configure SSO before you start setting up SCIM.
  • Define the groups in Alida to map to your Azure groups.
  • Generate an authentication token. Ensure that you have access to the following settings from the Alida User Auto-Provisioning page:
    • Base URL: The Alida SCIM API endpoint URL.
    • Token: The API token for authentication with the Alida SCIM API endpoints.
Important: Users will not be able to sign in to Alida while the initial provisioning process is running. Plan your user auto-provisioning roll-out at a time that minimizes user impact.
  1. Sign in to Okta as an administrator.
    Verify that you are in the Admin Console.
  2. Select Applications > Applications.
  3. Click the SSO app you created for Alida.
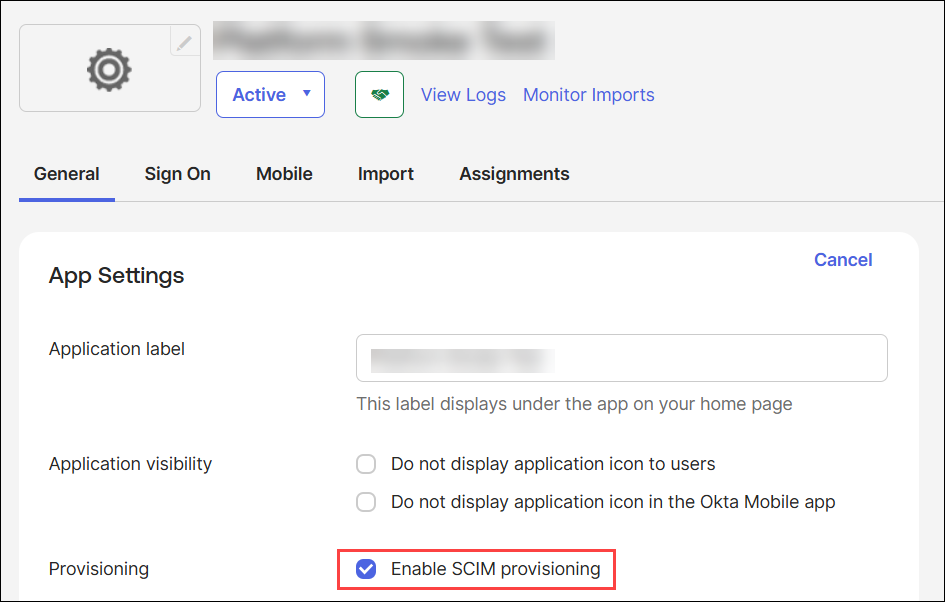
  4. Enable provisioning:
    1. Click on the General tab.
    2. In the App Settings section, click Edit.
    3. Next to Provisioning, select the Enable SCIM provisioning checkbox.
    4. Click Save.
      A new Provisioning tab is added to the application.
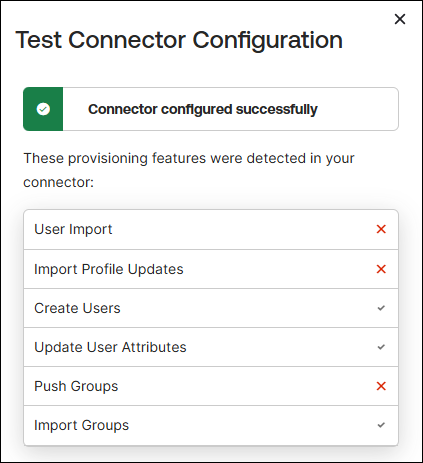
  5. Configure the SCIM connection:
    1. Click the Provisioning tab.
    2. In the left settings pane, select Integration.
    3. Click Edit.
    4. In the SCIM connector base URL field, paste the Alida Base URL value.
      This is the Base URL value displayed in the Authentication Credentials section on the User Auto-Provisioning page in Alida.
    5. In the Unique identifier field for users field, specify email as the attribute Okta should use to match users.
    6. In Supported provisioning actions, select the Push New Users, Push Profile Updates, and Import Groups checkboxes.
    7. For Authentication Mode, select HTTP Header.
    8. In the Authorization field, paste the Alida Token value.
      This is the token you previously generated in the User Auto-Provisioning page in Alida.
    9. Click Test Connector Configuration.
      Okta will verify the connection and show a success message.
    10. Click Close.
    11. Click Save.
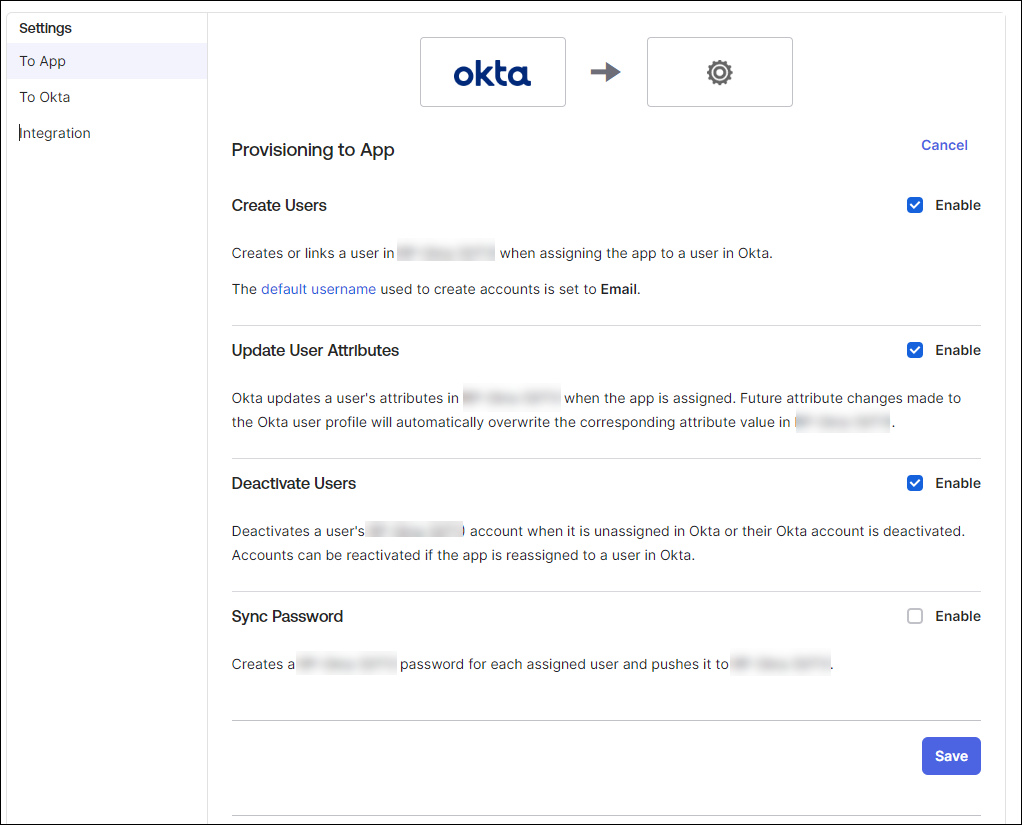
  6. Configure provisioning to the Alida app:
    1. In the left settings pane under Provisioning, select To App.
    2. Click Edit next to the Provisioning to App section.
    3. Click the Enable checkbox next to the provisioning features you want to enable:
      • Create Users: Automatically creates a user in the app when they are assigned in Okta.
      • Update User Attributes: Pushes profile updates from Okta to the app.
      • Deactivate Users: Deactivates or deprovisions the user in the app when they are unassigned from the app in Okta or their Okta account is deactivated.

    4. Click Save.
  7. Configure attribute mappings:
    1. Scroll down to the Attribute Mappings section on the To App page.
    2. Review the attribute mappings.
      Okta provides a default set of mappings. You can modify these to ensure attributes like first name, last name, and email are mapped correctly from the Okta user profile to the application's attributes.

      You can also add custom mappings, if required.

  8. Assign users or groups to the application:
    1. Go to the Assignments tab for the application.
    2. Assign individual People or Groups to the application.
      Once a user or group is assigned, the SCIM provisioning process will automatically trigger based on the settings you enabled.