Purge active members
Purging members is an important part of maintaining community health. For example, you may want to purge members who are not participating in activities as identified through the community profile metrics.
Create a filter condition to search for active members
You can only purge members with a status of Active and only 1000 active members can be purged at once on the Members page.
You must be an Admin user to perform this task.
Purging a member from the Community does not remove any posts or comments a member may have contributed to the hub. To overwrite a member's personal information from the hub, request to have the Sensitive Data feature enabled. For more information, see Sensitive data.
-
Click the
App Drawer and select
Members.

-
Click
Filters.

-
Create a filter to identify the members to purge:
-
Add any required criteria to narrow down the members to
include in the filter results.
Tip: Click Refresh next to the Total Eligible Recipients label to count the number of members that meet your filter criteria.

-
Add any required criteria to narrow down the members to
include in the filter results.
-
Select the checkbox in the column header to purge all members
that match your query, or select the checkboxes beside the members you want to
purge, and click
Purge.

Purge members using system upload
If you are purging more than 30 members at a time, or members from different groups, this is a faster and easier method.
-
Prepare the CSV file.
In the CSV file, include columns for
Email,Community, andmemberstatus, and setmemberstatustoPurged.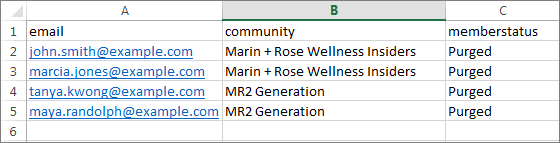
-
Click the
App Drawer and select
Member Groups.