Create a nested group
Add a subset of related questions to a group you created.
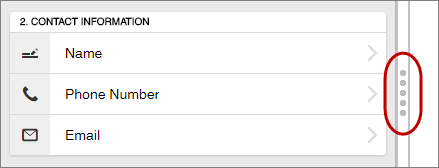
Tip: Use the handle to expand the Table of Contents so you
can see all of your nested groups at the same time.


- In the Table of Contents, select the group.
-
From the Survey Builder
Toolbox, under
Survey Actions, do one of the following:
- Drag the Group element onto the group you added to the Table of Contents.
- Click the Group element.
- Optional:
Edit the
Group name.
-
In the Table of Contents, click
Group.
Result: The Edit Pane appears.
-
In the
Group name field, rename the group.
Your group name:
- Should be unique.
- Can contain alphanumeric characters and symbols.
- Is not displayed to participants.
Note: The maximum number of characters is 100.
-
In the Table of Contents, click
Group.
- Optional:
Add a
Description (maximum 2500 characters).
The description is not visible to participants, but it is useful for annotating the group's contents. Descriptions are also displayed for groups that have been saved to the Template Library.
- Optional:
From the
Display objects in list, set the question
order by selecting one of the following:
- Authored order displays the questions in the order your questions appear in the Table of Contents.
- Random order changes the order of the questions each time the group is displayed to participants.
- Rotated order rotates the questions each time the group is displayed to participants. Each time the group is displayed, the first question is randomly selected to begin the rotation order. Then, the subsequent questions appear in the order designed in your survey.
Note:To prevent validation errors, do not randomize or rotate survey objects when:
- The group contains an End Survey action.
- You create a Survey Logic condition based on a question in the same group.
- You are piping answer text between two pages in the same group.
-
Close the
Edit Pane by clicking
the group name in the Table of Contents or click
Close.

-
Add questions to the nested group by doing one of the following:
Tip: You can automatically expand a collapsed group by hovering an item from the Survey Toolbox over the group name.
- From the Survey Toolbox, under Questions, drag a question type onto the nested group name in the Table of Contents.
- With the group highlighted in to Table of contents, click a question type in the Survey Toolbox.
- Add an existing question in the Table of Contents by dragging it onto of the group name.
Result: The question name appears indented below the group name. - Optional:
Collapse the group in the Table of Contents by clicking the arrow
on the left side of the group name.

- Optional:
Delete a group.
- In the Table of Contents, right-click the group name and select Remove, and then click Remove in the dialog that appears.
- In the
Edit Pane, click
More, and select
Delete.

Result: The group and all the questions contained in it are removed from your survey. - Preview your survey.