Preview a survey

Review and test what participants will see before you distribute your survey.

You can begin your preview from the start of your survey, or choose to begin the preview from a specific question or group.

When you preview your survey for the first time, the survey appears in the active theme from the first alphabetically listed community. However, you can create different themes for different surveys for each of your communities. For more information, see Create a survey theme. The next time you preview your survey, the survey appears in the theme the last time you viewed the survey. For more information, see Preview a survey theme.

  1. Open your survey preview.
    Option Description
    Preview the entire survey
    1. In the Survey Builder, on the Build toolbar, click Preview.

      If you only have one community or locale, the survey preview opens.

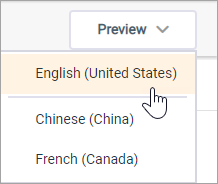
    2. If you have multiple communities with different locales, select the locale you want to preview from the drop-down list.

      A preview of your survey in the selected locale appears.

    Note: Multilingual survey authoring in Community is only available to customers who have multiple communities with different locales. If you are interested in multiple communities, please contact your Account Representative.
    Begin the preview from a specific question (default locale)
    • In the Editor workspace, in the Table of Contents, right-click the question and select Preview.
    • In the Editor workspace, in the Edit Pane, click Preview.
    Begin the preview from a specific question (survey translations)
    1. In the Translations workspace, select the locale you want to preview from the locale switcher.
    2. In the Table of Contents, select the question you want to preview.
    3. In the Edit Pane, click Preview.

      The question preview opens in the locale you are currently editing.

    Note: Analyst users can only preview the entire survey from the Monitor and Report pages.
  2. In the Preview Experience panel, select the Device Mode:
    • Desktop
    • Mobile

      If you select Mobile, select an orientation option:

      • Portrait
      • Landscape
  3. Select the community.
    Changing the community also changes the language used in the survey preview if the locale is different.
  4. Select the theme.
    Tip: The active theme is prefixed with Active in the list.
  5. Jump to another question by selecting it from the Start Preview At menu.
    Note: If you have questions nested inside profile-variable-based survey logic at the beginning of your survey, Start Preview At > Start from beginning won't work unless you also select the profile variables.
  6. Optional: Test different survey paths based on participants' profile variable values.
    This is recommended if you have survey logic, masking, or other survey elements that give participants a different survey experience depending on their profile variable values. Supported profile variable types include:
    • Single Choice
    • Multiple Choice
    • Number
    1. In the Simulate Profile Variables area, select the profile variable and values you want to test.
      Only profile variables referenced in the survey are listed.
    2. To add another profile variable, click Add Row.
      The rows are linked by an implicit "and" statement. A participant must have all the profile variable values to see the specific survey experience you are simulating.
    3. To delete a row, click the delete button beside it.
    4. To clear your selections, click Clear All.
    5. When you are finished, click Apply.
    Result: The preview refreshes and shows the version of the survey that a participant with the specified profile variable values will see.

    The profile variable simulation persists on a per user, per survey basis. If you navigate away from survey authoring or sign out of the application, the next time you open the survey preview, the profile variable simulation is still shown. Conversely, another user working on the same survey will see their own profile variable simulation settings persisting in the survey preview instead of yours.

  7. To preview the survey in a new browser tab, click Preview survey in new tab.
    Tip: Need to send the survey preview to internal stakeholders? You can copy and paste the URL from the new browser tab and share it. The preview URL is valid for 2 hours.
  8. Proceed through the survey in the preview panel.
    The results are recorded as test data. For more information, see Set data display options.

To change your survey theme, set the survey theme as active before you distribute your survey.