Invite participants to a scheduled video discussion

Invite or remind participants to choose a scheduled timeslot. After they have scheduled themselves, you can send follow-up interview communications to update participants on any changes. The interview communications also allow them to re-schedule or cancel.

Invite participants to schedule themselves

Prerequisites:
  1. Open the Surveys app and select your scheduled video discussion activity.
  2. On the activity toolbar, click the Distribute tab.
  3. On the left side, click Schedule Invitations.
  4. Click New > Schedule Invitation.

    Use this invitation type to invite participants to choose a scheduled timeslot. You must send a schedule invitation before you can send interview communications.

  1. In the Create New Schedule Invitation dialog, enter a name for the invitation, select a community if there are multiple communities, and click Create.
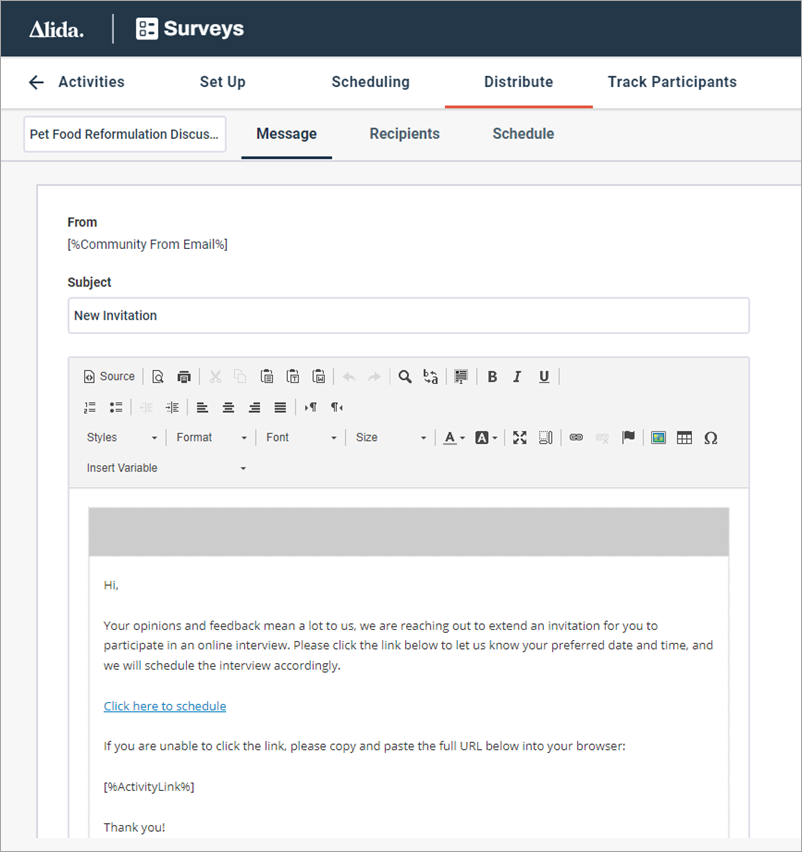
  2. In the Message tab, update the email message with any information specific to your video discussion, such as the length of the video discussion and the date and time when it will take place.
    You can leave these variables and links as is:
    • [%ActivityLink%]
    • Click here to start


  3. Click the Recipients tab, and add recipients in one of the following ways:
    Note: The meeting room can record up to 16 participants (for example, 1 moderator and 15 interviewees). Please be mindful of this limit if you invite more than 15 interviewees.
  4. If you selected an existing member filter, or created a new member filter, you can select only a specific subset of members to send the invite to.
    Note: The selected member filter cannot include more than 500 users.
    1. In the Confirm Filters dialog box, click the Select Participants tab.
    2. Click the checkbox next to the name of each member to include.
    3. Click Save.
  5. If you want to schedule the invitations to be sent at a later time, click the Schedule tab.
    1. Under Send Date, select Later.
    2. Click inside the Date field, and then select the date from the calendar.
    3. From the Time menu, set the time at which the email will be sent by doing either of the following:
      • Type the time according to the required format, and press Enter.
      • Click inside the Time field, and then select the time from the menu.
    The Time setting is based on your computer's time zone.
  6. Optional: You can choose to send a test email to preview the invite:
    1. Click Test Email.
    2. Enter the email, or a comma-separated list of emails, to send the test to.
    3. Click Send Test.
  7. Click Review and Send.
  8. Review the information displayed and click Schedule Send for scheduled emails or Send Now for invites to be sent immediately.
  9. After you invite participants, you can:
    • Manage scheduled video discussion interviews.

      Check the Scheduling tab to view the details of each scheduled timeslot, manage quotas, and include or exclude timeslots from the list of available times participants can choose from.

    • Send reminders to participants.

      Remind participants to select a scheduled timeslot, or remind them of their confirmed interview.

      • When you create a schedule reminder, the status options are:
        • Has Not Scheduled
        • Interview Canceled
        • Member Canceled
      • When you remind confirmed participants, select Confirmed in the Participation section on the Recipients tab.

Remind participants to schedule themselves

Prerequisites:

One or more schedule invitations were sent.
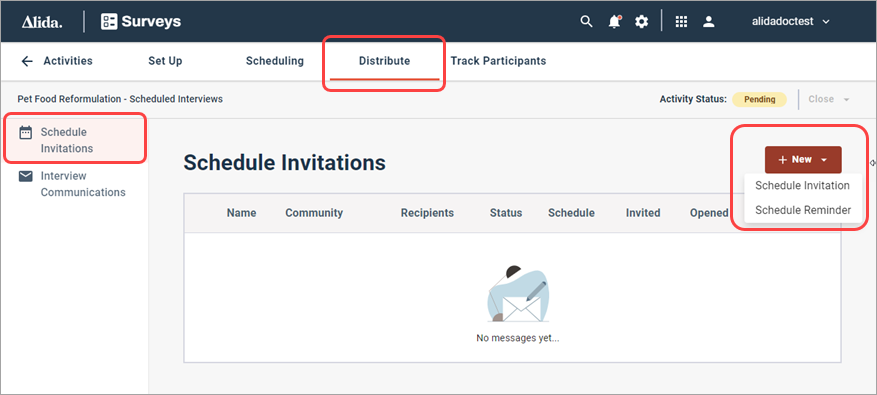
  1. Open the Surveys app and select your scheduled video discussion activity.
  2. On the activity toolbar, click the Distribute tab.
  3. On the left side, click Schedule Invitations.
  4. Click New > Schedule Reminder.

  1. In the Create New Schedule Reminder dialog, enter a name for the invitation, select a community if there are multiple communities, and click Create.
  2. In the Message tab, update the email message with any information specific to your video discussion, such as the length of the video discussion and the date and time when it will take place.
    You can leave these variables and links as is:
    • [%ActivityLink%]
    • Click here to start
  3. Click the Recipients tab.
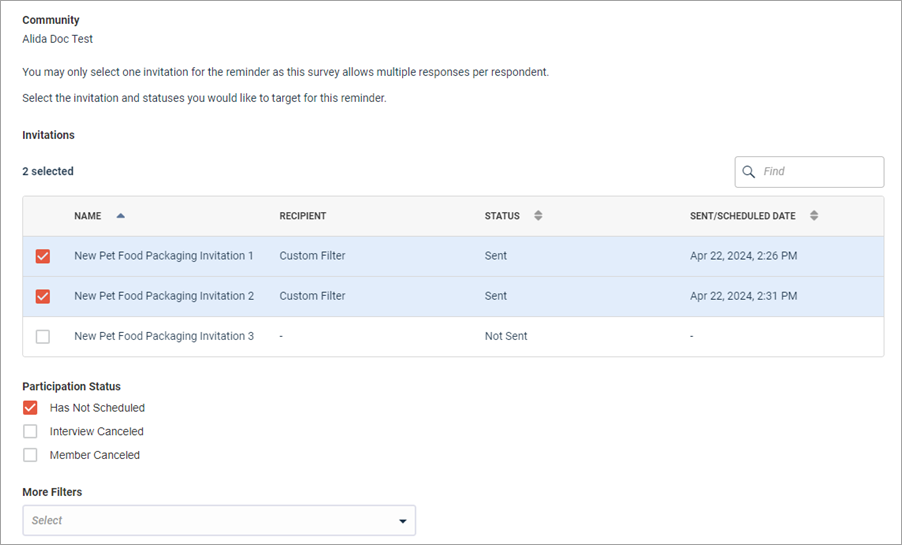
  4. In the Invitations area, select the open and pending invitations.
    Click Name, Status, or Sent/Scheduled Date to sort the invitations in ascending or descending order.
    Note:
    • If you want to select a closed invitation, you must re-open it.
    • Reminders use the activity theme selected at the time each invitation was created.
  5. In the Participation Status area, select which participation statuses you want to include in this reminder.
    Option Description
    Has Not Scheduled These participants were invited, but haven't chosen a scheduled timeslot. Selected by default.
    Interview Canceled These participants became unscheduled because their interview was canceled.
    Member Canceled These participants chose a scheduled timeslot, and then canceled their interview.

  1. Optional: Select More Filters.
    Tip: Using a member filter to target your reminder will help increase participation for a specific demographic.
    Result: The Total Eligible Recipients is updated to show the number of members who will receive the reminder.
  2. If you want to schedule the invitations to be sent at a later time, click the Schedule tab.
    1. Under Send Date, select Later.
    2. Click inside the Date field, and then select the date from the calendar.
    3. From the Time menu, set the time at which the email will be sent by doing either of the following:
      • Type the time according to the required format, and press Enter.
      • Click inside the Time field, and then select the time from the menu.
    The Time setting is based on your computer's time zone.
  3. Optional: You can choose to send a test email to preview the invite:
    1. Click Test Email.
    2. Enter the email, or a comma-separated list of emails, to send the test to.
    3. Click Send Test.
  4. Click Review and Send.
  5. Review the information displayed and click Schedule Send for scheduled emails or Send Now for invites to be sent immediately.

Send follow-up interview communications

Once you've sent schedule invitations and reminders and your participants have scheduled themselves, you can send them follow-up emails to update them on any interview changes. These emails also allow participants to reschedule or cancel.

Prerequisites:
  • Manage scheduled video discussion interviews.
  • On the Scheduling tab, click Refresh to show the latest interview details.

    You must click Refresh every time you update interview details. Otherwise, participants will not see the updates.

Interview communications are multi-response emails. Participants can use the links multiple times to update their scheduling.
Note: Participants are unaware of any changes you make to interviews after schedule invitations and reminders are sent, so you must send an interview communication to update them.
  1. Open the Surveys app and select your scheduled video discussion activity.
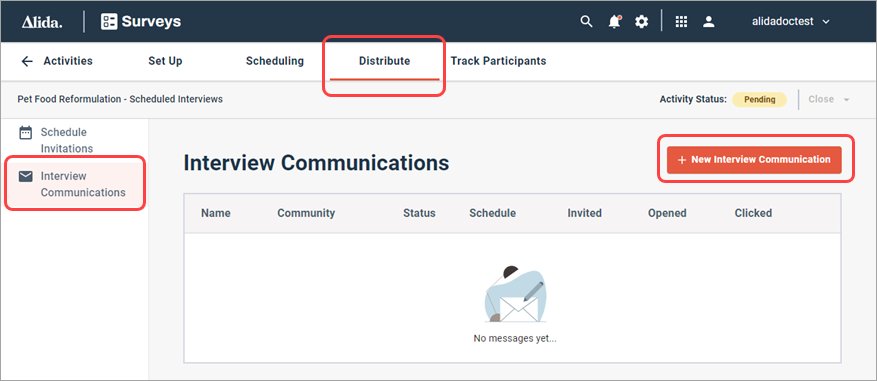
  2. On the activity toolbar, click the Distribute tab.
  3. On the left side, click Interview Communications.
  4. Click New Interview Communication.

  1. In the Create New Interview Communication dialog, enter a name for the email, select a community if there are multiple communities, and click Create.
  2. In the Message tab, update the body text.
    You can leave these variables and links as is:
    • [%ActivityLink%]
    • Click here to start
    • [%EventName%]
    • [%InterviewDate%]
    • [%InterviewTime%]
    • Click here to cancel or reschedule
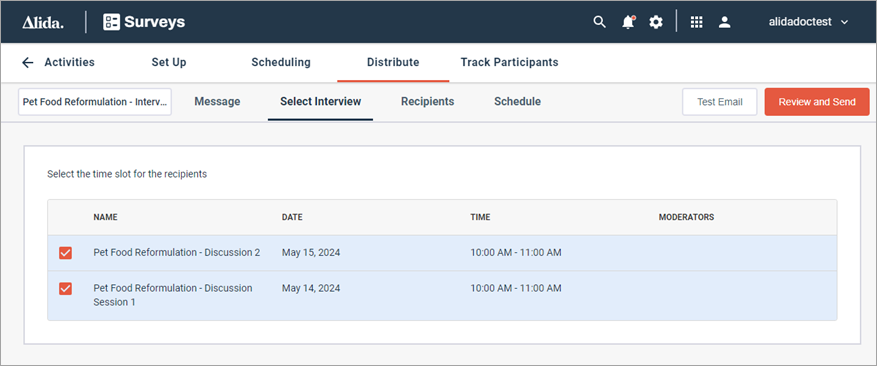
  3. Click Select Interview.
  4. Select the interviews.

    Participants who are scheduled for these interviews will receive an email.

  5. On the Recipients tab, toggle Automatically invite new eligible recipients on or off.
  6. If you want to schedule the invitations to be sent at a later time, click the Schedule tab.
    1. Under Send Date, select Later.
    2. Click inside the Date field, and then select the date from the calendar.
    3. From the Time menu, set the time at which the email will be sent by doing either of the following:
      • Type the time according to the required format, and press Enter.
      • Click inside the Time field, and then select the time from the menu.
    The Time setting is based on your computer's time zone.
  7. Optional: You can choose to send a test email to preview the invite:
    1. Click Test Email.
    2. Enter the email, or a comma-separated list of emails, to send the test to.
    3. Click Send Test.
  8. Click Review and Send.
  9. Review the information displayed and click Schedule Send for scheduled emails or Send Now for invites to be sent immediately.