Multiple communities FAQs
Refer to this topic for frequently asked questions about multiple communities.
All customers
How do I distribute an activity across communities?
When you create a new distribution email or activity link, you are asked to assign the community for which the email is intended.
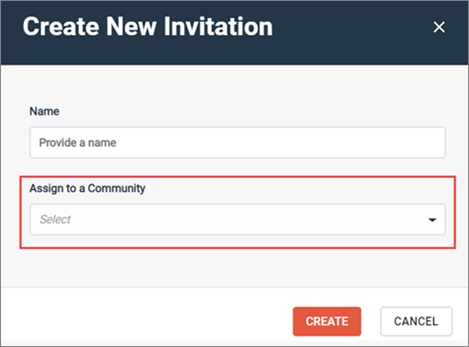
Once you select the community from the Assign to a Community list and click Create, that community is the target community for your distribution.
To distribute an activity to multiple communities, create a separate invitation for each community.
For more information, see Create an invitation and Create a new activity link.
How do I distribute a survey in multiple languages?
You can use surveys or power surveys to distribute a single survey to multiple locales. Community automatically selects the appropriate version of the translated survey for the community you select.
| Example |
|---|
You have the English, French, and German versions of a survey and you create a new invitation in Community. You assign the invitation to your French community. This particular invitation automatically distributes the French version of your survey to the members of that community. |
For more information about using power surveys, see Deploying a survey in multiple languages.
For more information about using surveys, see The multilingual surveys workflow.
How do I identify members in multiple communities?
Use the
Community system variable, which is available
wherever profile variables are available.
You can use
Community:
- In surveys for survey logic
- In reports, report filters, and subgroups to enhance your data analysis
- In community metrics to analyze the overall health of your communities
| Example: Use the Community system variable in survey logic |
|---|
You want to send the same survey to multiple communities. However, your survey only contains a few questions specific to each community, while the rest of the survey is the same. After you add the Survey Logic action to your survey, create a condition to display this group only to participants whose community is your target community:  You can then add the questions you want to ask the community members to the survey logic action. |
In activity invitations, there is no need to edit member filters to
account for
Community. This is already taken care of when you
first create the invitation and specify the intended community.
How do I view community information in reports?
To view community information in reports, you can add a subgroup
based on the
Community system variable.
- Click the
App Drawer and select
Activities, open a survey from the
Activities page, and then click
Report on the activity toolbar. Then, select
a report from the list.

- In the Report toolbar, click Subgroup.
- In the Subgroup dialog, click +Subgroup.
- In the Add Subgroup area, select Profile Variables from the Source list.
- Select
communityfrom the Profile Variables list and click Add. - Select the community you
want to include in the report and click
Apply.
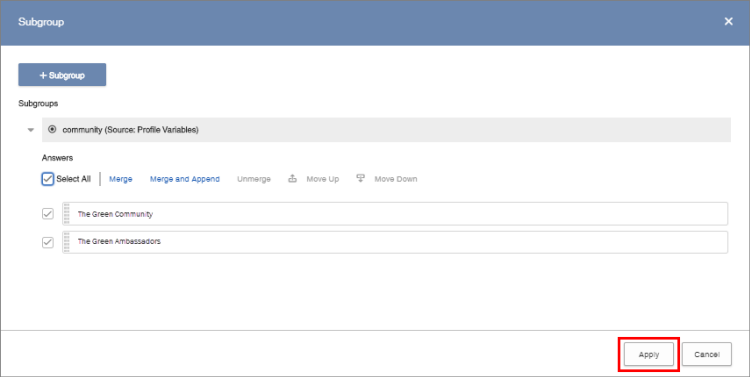
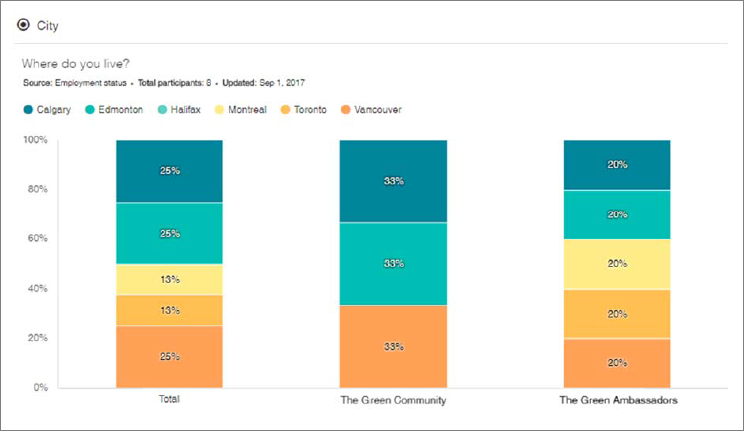
After you click Apply, each question will have multiple charts, including a total chart and a chart for each community.
How do profile variables work?
Profile variables can be unique to a single community or shared across multiple communities.
| Example |
|---|
Marin + Rose Wellness Insiders and MR2 Generation are multiple communities that share some profile variables like Gender and Household Income. MR2 Generation, which is aimed at a younger demographic than Marin + Rose Wellness Insiders, also has the profile variables High School Grade and College Year.
|
How do I apply a theme to my activity?
You apply an activity theme the same way you do currently. The list of available themes differs based on the community you specified when you were creating a distribution email or an activity link, or when you were setting a community theme as active. You can also duplicate a theme from one community to another.
How do I make changes to themes?
You create and edit community themes the same way you do currently, but now you must filter the list of themes by community first. For more information, see Create a community theme.
What happens to power surveys theming?
For new customers, power surveys theming is handled through Community theming.
For upgraded customers, you can switch between Community theme types in Power Survey Authoring.
For more information, see Create and use Community themes in power surveys and Power survey themes.
How do I apply a theme to my distribution emails?
You apply an activity theme the same way you do currently. The list of available themes differs based on the community you specified when you were creating the distribution email.
By default, an invitation's theme is set to the active community theme. The selected theme is only visible to the invitation's recipients, but the same activity can have multiple invitations, each one with a different theme.
How do I view statistics and community metrics?
You view statistics and community metrics the same way you do currently. For survey and forum statistics, select a community from the menu.
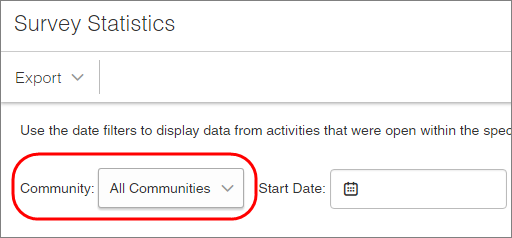
For community metrics, you can view the metrics for one community at
a time by using the
Community system variable as a profile variable to
filter your data.
| Example: View the size of a given community over time |
|---|
|
How do I switch members from one community to another?
Perform a system upload and include a column called
Community with the updated community name values.
For more information, see
Perform a system upload.
How do I view and edit community settings?
You can view and edit community settings by opening the Technical Configuration page.
- In the navigation bar,
click
.

- In the community list,
select the community for which you want to view or edit settings.
The Web Settings area displays the relevant information.
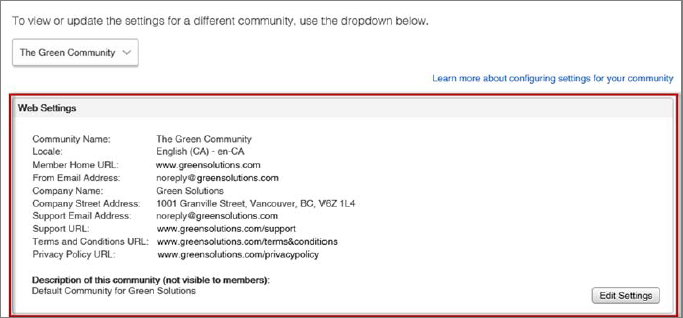
- To edit the settings, click Edit Settings.
- In the
Community Setting dialog, you can edit the
settings in the editable fields.
Note: To change any of the read-only settings, you will need to contact Technical Support.
Why does my community appear as inactive?
A community may appear as inactive for any of the following reasons:
- The community is in the process of being set up and is pending.
- The community was identified as defunct during the upgrade process and is no longer available.
You will not be able to distribute new activities to members of inactive communities. However, an inactive community's data is still available to view in community metrics and in reporting.
Upgraded customers
The new terminology is confusing.
| Sparq 1 term | Description | Community term |
|---|---|---|
| Segment | Refers to a group of customers who require a specific member experience. | Multiple community or community |
| Culture | Refers to the segment's default language. |
Language: Refers to the general language. Locale: Refers to the region-specific variant of the language. For example, English is the language, and en-US and en-CA are locales. |
| Skin |
Refers to the branding and design members see when they participate in your activity. |
Theme |
| Environment |
Refers to the segment name when you are creating a panel sample. |
Multiple community or community |
What happens to recruitment?
For now, recruitment continues to be handled through Sparq 1.
New customers
How do I recruit members?
Recruitment surveys work the same way as surveys, and you can distribute the same recruitment survey across multiple communities. When you create a new distribution email or recruitment link, you are asked to specify the community for which it is intended. For more information, see Create an invitation and Create a new activity link.
- A member can only belong to or try joining one community at a time. If pending or active members of one community try to join another community, they will be redirected to the correct member hub.
- If you are using one recruitment survey to recruit across multiple communities, you must edit the confirmation emails for each community before you distribute the survey.

