The instant video discussion workflow
An instant video discussion is ideal if you're engaging a couple of participants and you already know their availability, so you can invite them all directly to one timeslot.
For more information about both types of video discussions and which one is right for you, see Video discussions.
- Can view the Video Discussion projects and moderate interviews
- Can create new Video Discussion projects
- Can schedule Video interviews and manage projects
- Can schedule distributions
- Can access sensitive data
Step 1: Create a screening survey
This step is optional but recommended. Before you create and distribute a video discussion, create and distribute a survey that screens for eligible and willing participants. The survey can ask:
- For participants' consent to appear on video.
- For confirmation of their
availability during the instant video discussion's date and time.
Tip: Check your personal calendar and ensure that you are also available at this date and time.
- Project-specific questions.
- Profiling questions.
After distributing the survey, look at the results in reporting:
- Add the profile variables firstname, lastname, and email to the report.
- Ensure the report is only displaying Complete responses.
- Export the report to Excel.
- Evaluate who consented and is eligible. You will send these participants direct invitations to the instant video discussion.
Step 2: Create a video discussion
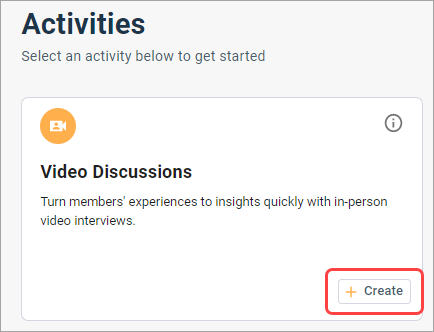
Open the Surveys app and create a new video discussion activity. You can specify the name of the activity and who has access to it.

Set the Meeting Type to Instant Interview.
Step 3: Set up your video discussion
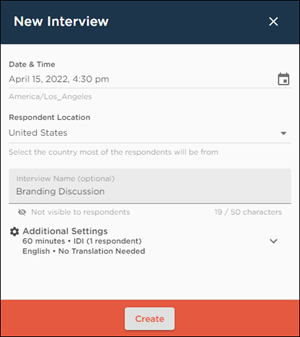
On the Set Up tab, click the Set Up button to open the Overview page in a new browser tab. From there, you can set up the basic details of your video discussion.

You can do this in one of two ways:
- From the Overview page, click Schedule Interview.
- From the Calendar page, click a timeslot in the calendar.
Afterward, you can add the invite to your calendar. You can also use the Overview page to manage upcoming sessions, manage project settings, or set your default timezone.
Step 4: Set up video discussion content
If you have supplementary materials and activities that participants need access to during their session, prepare them in advance. You can also take this time to prepare follow-up discussion points that moderators and observers will need after the session.
- Create a discussion guide that lists questions and sections. Discussion guides can help moderators stay focused during the session and let observers know what is coming next.
- Polls can add an interactive element to your video discussion and help you gather quantitative data during the session.
- Upload stimuli that participants can refer to such as images, videos, and documents .
- For moderators and observers, create takeaway questions that you can share at the conclusion of a video discussion.
Step 5: Manage project settings
Refine the smaller details of the video discussion experience for participants. Specify meeting room and privacy settings, like whether the participants' video should be blurred in the session recording, or if pseudonyms should be used in the meeting room. For more information, see Manage project settings.
Step 6: Test the video discussion experience
Use your personal meeting room to see how stimuli will be displayed to participants. For more information, see Personal Meeting Room.
Step 7: Distribute the video discussion
Invite participants to your video discussion.
- Invite participants to an instant video discussion
Tip:
- If you used a screening survey, there's an easy way to enter the emails you've already identified as your participant group. On the Recipients tab, from the Add Recipients menu, select Enter recipients email and enter the email addresses of the Complete responses from your Excel export as a comma-separated list.
- If you are creating
or editing a member filter:
- Click the Select Participants tab to select individual participants to invite.
- Clear the Community Engagement Rule check box. Otherwise, participants' recent participation in the screening survey may prevent them from receiving the video discussion invitation.
- Create a reminder
If you need to grant access to third party moderators and observers who don't have Alida login credentials, now is the time to do it. For more information, see these topics: .
- Grant video discussion access to a third party moderator
- Grant video discussion access to a third party observer
Step 8: Conduct the video discussion and track participants
When the scheduled time for your video discussion arrives, join the session as a moderator or an observer.
As a moderator, you may have to do the following tasks during the session:
- Share your screen during a video discussion
- Share stimuli during a video discussion
- Mark up stimuli using the whiteboard
- Request mobile screen sharing from participants
- Track participant confirmations and attendance
When the session is over, share the takeaway questions with moderators and observers. Take the time to review key insights and observations.
Step 9: Review video
After you conduct your interview, review and analyze the video and transcript of the video discussion. As part of this process, you can:
